由於 pureMVC Standard and MultiCore 兩個版本寫法幾乎沒啥差別,開發的專案都統一使用彈性比較大的 MultiCore 版本來實作。跟 pureMVC 相處了一陣子後,漸漸地對它也沒有什麼特別的不爽...快,所以 Cairngorm and pureMVC 的選擇,也就由 pureMVC 勝出了(當然是有惡勢力的...冏)。
以下的範例還是使用 pureMVC Standard 來實作喔!這個範例應該能更容易理解 Mediator, Command and Proxy 合作的模式。


1. 由 DataProxy 開始寫
這次的 DataProxy 負責的是將 input textfield 中的文字儲存起來也提供清除的方法。 DataProxy 並不認識任何 Mediator。
重點在這邊,DataProxy 只負責發送 data updated Notification 出去,其他啥都不管。
2. UpdateDataCommand:
用來處理呼叫 DataProxy save and clear function 用 command。可以避免由 view component 的 Mdeiator 直接取用修改 DataProxy。
資料處理完後接下來要準備製作 view component 囉!
3. TestpureMVC2.mxml
只負責發兩個 event "save" and "clear",順便提供兩個屬性給外面使用。
4. View component 做完就開始寫它的邏輯中介者 AppMediator
這個 AppMediator 透過 DataProxy.SAVE_DATA and DataProxy.CLEAR_DATA Notification 跟外面溝通,如果把 SAVE and CLEAR 的常數建在別的 Class 中,你會發現 AppMediator 跟 DataProxy 一點關係都沒有,名言就是…我不認識你,你最好也不要認識我啊...XD
5. 幾乎完成啦!接下來將 ApplicationFacade 寫好:
@@ 完全沒動過的標準寫法....
6. 最後的 StartupCommand:
將 DataProxy.SAVE_DATA and DataProxy.CLEAR_DATA 指定到 UpdateDataCommand。
完工!!
這次練習的重點就是讓 Mediator and Proxy 關係更不好,當你可以弄到它們互相裝做不認識對方的時候,就是你成功的日子啊!
以下的範例還是使用 pureMVC Standard 來實作喔!這個範例應該能更容易理解 Mediator, Command and Proxy 合作的模式。
1. 由 DataProxy 開始寫
這次的 DataProxy 負責的是將 input textfield 中的文字儲存起來也提供清除的方法。 DataProxy 並不認識任何 Mediator。
package com.mvc.model
{
 import mx.collections.ArrayCollection;
 import org.puremvc.as3.patterns.proxy.Proxy;

 public class DataProxy extends Proxy
 {
  public static const NAME:String = 'dataProxy';
  public static const DATA_UPDATED:String ="data_updated";
  public static const SAVE_DATA:String = 'save_data';
  public static const CLEAR_DATA:String = 'clear_data';
  public function DataProxy()
  {
   super(NAME, new ArrayCollection);
  }
  public function save(obj:Object):void{
   list.addItem(list.length+" : "+obj);
   sendNotification( DATA_UPDATED, data );
  }
  public function clear():void{
   setData(new ArrayCollection);
   sendNotification( DATA_UPDATED, data );
  }
  //隱藏的 getter 給自己看的,順便轉換資料型態
  private function get list() : ArrayCollection {
    return data as ArrayCollection;
  }
 }
}
sendNotification( DATA_UPDATED, data ); 重點在這邊,DataProxy 只負責發送 data updated Notification 出去,其他啥都不管。
2. UpdateDataCommand:
用來處理呼叫 DataProxy save and clear function 用 command。可以避免由 view component 的 Mdeiator 直接取用修改 DataProxy。
package com.mvc.control
{
 import com.mvc.model.DataProxy;
 import org.puremvc.as3.interfaces.INotification;
 import org.puremvc.as3.patterns.command.SimpleCommand;

 public class UpdateDataCommand extends SimpleCommand
 {
  public function UpdateDataCommand()
  {
   super();
  }
  override public function execute(notification:INotification):void
  {
   var proxy:DataProxy = facade.retrieveProxy( DataProxy.NAME ) as DataProxy;
   if(notification.getName() == DataProxy.SAVE_DATA){
    proxy.save(notification.getBody());
   }else{
    // notification.getName() == DataProxy.CLEAR_DATA
    proxy.clear();
   }
  }
 }
}
資料處理完後接下來要準備製作 view component 囉!
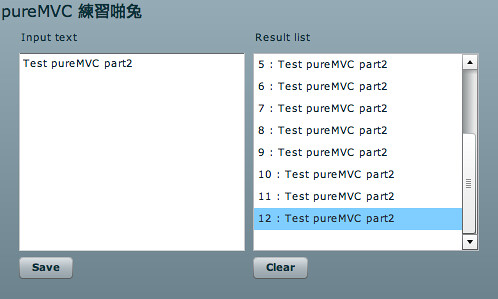
3. TestpureMVC2.mxml
只負責發兩個 event "save" and "clear",順便提供兩個屬性給外面使用。
<?xml version="1.0" encoding="utf-8"?>
<mx:Application xmlns:mx="http://www.adobe.com/2006/mxml"
 layout="absolute" applicationComplete="facade.startup( this );" width="500" height="300">
 <mx:Metadata>
  [Event("save")]
  [Event("clear")]
 </mx:Metadata>
 <mx:Script>
  <![CDATA[
   import mx.collections.ArrayCollection;
   import com.mvc.ApplicationFacade;
    private var facade:ApplicationFacade = ApplicationFacade.getInstance();

    [Bindable]
    public var list:ArrayCollection;

    [Bindable]
    public var input:String;

  ]]>
 </mx:Script>
 <mx:Label text="pureMVC 練習啪兔" fontSize="16" />
 <mx:HBox width="100%" height="100%" y="30"
   paddingLeft="20" paddingRight="20" paddingBottom="20">
   <mx:VBox width="100%" height="100%">
    <mx:Label text="Input text" />
    <mx:TextInput id="inputTxt" width="100%" height="100%" text="Test pureMVC part2"/>
    <mx:Button label="Save"
      click="input=inputTxt.text;
       dispatchEvent(new Event('save'))" />
   </mx:VBox>
   <mx:VBox width="100%" height="100%">
    <mx:Label text="Result list" />
    <mx:List dataProvider="{list}" width="100%" height="100%" />
    <mx:Button label="Clear" click="dispatchEvent(new Event('clear'))" />
   </mx:VBox>
 </mx:HBox>
</mx:Application>
4. View component 做完就開始寫它的邏輯中介者 AppMediator
package com.mvc.view
{
 import com.mvc.model.DataProxy;
  import flash.events.Event;
 import mx.collections.ArrayCollection;
 import org.puremvc.as3.interfaces.INotification;
 import org.puremvc.as3.patterns.mediator.Mediator;

 public class AppMediator extends Mediator
 {
  public function AppMediator(mediatorName:String=null, viewComponent:Object=null)
  {
   super(mediatorName, viewComponent);
   //接收UI的Event
   app.addEventListener( "save", doClick);
   app.addEventListener( "clear", doClick);
  }
  override public function listNotificationInterests():Array
  {
   //要處理啥訊息都在這邊列好
    return [
               DataProxy.DATA_UPDATED
             ];
  }
  override public function handleNotification(notification:INotification):void
  {
   //處理 data updated notification,將收到的資料送回 app.list
   switch(notification.getName()){
    case  DataProxy.DATA_UPDATED:
     app.list = notification.getBody() as ArrayCollection;
   }
  }
  //給自己看的,重點還是轉換物件型態
  private function get app():TestpureMVC2 {
   return viewComponent as TestpureMVC2;
  }
  //當收到 click event 只將 Notification發送出去
  private function doClick(event:Event):void{
   switch(event.type){
    case "save":
     sendNotification( DataProxy.SAVE_DATA, app.input);
    break;
    case "clear":
     sendNotification(DataProxy.CLEAR_DATA);
    break;
   }
  }
 }
}
這個 AppMediator 透過 DataProxy.SAVE_DATA and DataProxy.CLEAR_DATA Notification 跟外面溝通,如果把 SAVE and CLEAR 的常數建在別的 Class 中,你會發現 AppMediator 跟 DataProxy 一點關係都沒有,名言就是…我不認識你,你最好也不要認識我啊...XD
5. 幾乎完成啦!接下來將 ApplicationFacade 寫好:
package com.mvc
{
 import com.mvc.control.StartupCommand;
 import mx.core.Application;
 import org.puremvc.as3.interfaces.IFacade;
 import org.puremvc.as3.patterns.facade.Facade;

 public class ApplicationFacade extends Facade implements IFacade
 {
  public static const STARTUP:String = 'startup';
   public function ApplicationFacade()
  {
   super();
  }
  public static function getInstance() : ApplicationFacade
  {
     if ( instance == null ) instance = new ApplicationFacade( );
     return instance as ApplicationFacade;
    }

     override protected function initializeController( ) : void
    {
     super.initializeController();
     registerCommand( STARTUP , StartupCommand );
    }

    public function startup( app:Application ) : void
    {
    sendNotification( STARTUP, app );
    }
 }
}
@@ 完全沒動過的標準寫法....
6. 最後的 StartupCommand:
package com.mvc.control
{
 import com.mvc.model.DataProxy;
 import com.mvc.view.AppMediator;
 import org.puremvc.as3.interfaces.INotification;
 import org.puremvc.as3.patterns.command.SimpleCommand;

 public class StartupCommand extends SimpleCommand
 {
  public function StartupCommand()
  {
   super();
  }
  override public function execute(notification:INotification):void{
   facade.registerMediator( new AppMediator(null, notification.getBody()) );
   facade.registerProxy( new DataProxy());
   //註冊 Save and Clear 對應的 UpdateDataCommand
     facade.registerCommand( DataProxy.SAVE_DATA , UpdateDataCommand );
     facade.registerCommand( DataProxy.CLEAR_DATA , UpdateDataCommand );
  }
 }
}
將 DataProxy.SAVE_DATA and DataProxy.CLEAR_DATA 指定到 UpdateDataCommand。
完工!!
這次練習的重點就是讓 Mediator and Proxy 關係更不好,當你可以弄到它們互相裝做不認識對方的時候,就是你成功的日子啊!
問一下唷^^~
ReplyDelete[mx:Metadata]
[Event("save")]
[Event("clear")]
[/mx:Metadata]
這段的含意是?
如果只有
public static const SAVE:String = "save";
public static const CLEAR:String = "clear";
dispatchEvent(new dispatchEvent(SAVE));
dispatchEvent(new dispatchEvent(CLEAR));
這樣會有問題嗎?
嘗試了一下
ReplyDelete好像沒有差別呢!!!
是我沒注意到什麼嗎?
宣告 Metadata Event 的用意就是要給 mxml 辨認:如 Button ,你直接用 mxml 寫的時候不是可以直接 < mx:Button click="ClickEvent" .....> 這個 click 就是使用 Metadata 宣告來的...所以我上面寫在 mx:Application 是有點無聊的...
ReplyDelete